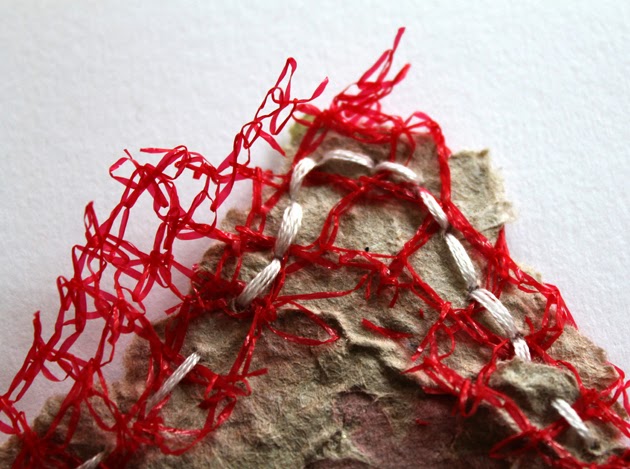
I also tested out adding other components. These ranged from ribbon and shoe laces through to other pieces of paper. These added components not only added decoration but in some cases additionally added support- reinforcing the edges of my papers. On a number of samples I experimented with using red fruit netting wrapped around the paper edge. I really liked the splash of colour this gave and will consider using this on my final embroidered panel.
I came across many challenges with trying out my stitched edges. When machine stitching the stitch patterns did not always come out very clearly. If I got too close to the edge then they could virtually disappear or worse tear the paper. Hand stitching brought issues with needle size. In order to use thick embroidery threads I needed to use larger needles. These could create holes that either rendered the edges too fragile or completely changed the dynamic of the effect I was trying to create. Layering up the machine stitching, especially in rows at the edge of the paper such as in image 4/9/5 I found to add rigidity to the paper.
To get around the fragility of the paper edges I layered up my papers, using stitching to connect them together. Image 4/9/8 is a good example for this.
In most cases I followed the natural raw edge of my papers. This frequently gave a rather undulating effect. I found this was accentuated the most by edging with machine stitching. This both neatened and strengthened it as well as emphasised the curves within it. I was particularly pleased with the machine version of blanket stitch combined with white satin ribbon- see image 4/9/2. Hand stitching gave a very different effect. If anything it added to the 'roughness' of the paper edge and in some cases made the sample look quite scruffy as in image 4/9/21 although some of this effect could be put down to the netting as well. Hand stitching worked the best when the edge of the paper was particularly uneven- see image 4/9/26.
The following photographs show a range of samples that tested out all the different possibilities I have mentioned. They are not in any particular order. These were the successful ones.... many attempts had to be re-stitched as my learning curve with working with my hand made papers was very steep!
 |
| 4/9/1 |
 |
| 4/9/2 |
 |
| 4/9/3 |
 |
| 4/9/4 |
 |
| 4/9/5 |
 |
| 4/9/6 |
 |
| 4/9/7 |
 |
| 4/9/8 |
 |
| 4/9/9 |
 |
| 4/9/10 |
 |
| 4/9/11 |
 |
| 4/9/12 |
 |
| 4/9/13 |
 |
| 4/9/14 |
 |
| 4/9/15 |
 |
| 4/9/16 |
 |
| 4/9/17 |
 |
| 4/9/18 |
 |
| 4/9/19 |
 |
| 4/9/20 |
 |
| 4/9/21 |
 |
| 4/9/22 |
 |
| 4/9/23 |
 |
| 4/9/24 |
 |
| 4/9/25 |
 |
| 4/9/26 |