Thursday, 28 May 2015

Module 4, chapter 10: Book type structures

For this chapter I experimented with a variety of methods to join paper together to create 'book like' structures. I tested both hand stitching and machine stitched techniques. Some samples I used a hole punch so that I could loop ribbon through to connect pieces. Some samples I used a drinking straw to create a 'rod' to connect the pages to. A variety of the initial samples I created can be seen in the following image and this is followed by some close ups and explanations of some of these samples. I then have examples of further developmental samples that I progressed onto. Note that with all my samples I was not focusing on the quality or neatness of what I was doing- if anything I was embracing the unevenness of the paper edges!

4/10/1
4/10/1: A range of initial samples

4/10/2
4/10/2:
Each layer of paper has been individually sewn to a wide piece of ribbon.
This ribbon has then been folded over to the front.
4/10/3
4/10/3:
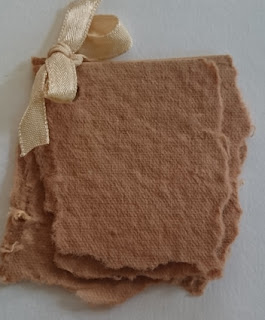
Hole punched and tied together with ribbon.
A simple but effective method of connecting paper together without the limitations of the number of pages that can be together at one time that the stitching alternatives give.
4/10/4
4/10/4:
Papers stitched down the middle in the machine and then folded in half.
An effective method however limited due to the number of pages that can be stitched together at any one time.
4/10/5
4/10/5:
Hole punched and the wrapped with ribbon over a drinking straw for support.
Must remember for future reference not to punch so close to the edge as the paper is very fragile and tears easily here.
4/10/6
4/10/6:
Paper pages wrapped around a drinking straw and then held in place with hand stitching.
The next stage of experimentation involved me looking into alternative ways of attaching papers together so that I was not feeling limited by the thickness that trying to sew multiple sheets together had been giving me, I had found up until this point that 4 layers was about as thick as I could go with both hand and machine stitching before it became too thick to sew. My first attempts tried a 'staggered' effect- where each sheet was attached only to the one it was next to. The following images show front and back views of how this came out. If I was to go on and use this method I would sew each layer closer together rather than have them as spread out as the photos are showing.

4/10/7
4/10/7
4/10/8
4/10/8
The following images shows an alternative version of these- each layer is sewn to a single background.This gave an interesting 'ruffle' effect.

4/10/9
4/10/9
4/10/10
4/10/10
The next sample created used a 'flouncing' technique that I had previously only used on fabric. This was similar to the 'ruffle' style paper sample but instead of attaching the paper to the backing on the edge, I attached in the center creating a two page effect. Once several pages had been attached in this way I started to see a mini book effect take shape. This would be a particularly good method to use if I wanted to attach a more significant number of pages to my end piece. I have shown this sample from a variety of angles.

4/10/11
4/10/11
4/10/12
4/10/12
4/10/13
4/10/13
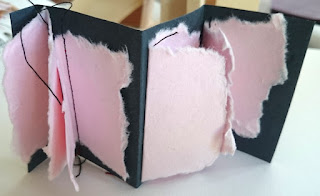
To develop this idea further I created a concertina style backing and attached the pages at different points along the length. The following photos show this open and closed.

4/10/14
4/10/14
4/10/15
4/10/15
The next set of experimental samples I tried were of separate pieces of paper that had been connected through machine stitching. I deliberately kept a wide gap between pages to see what the stitching looked like. Although it did not keep to the same stitch pattern as seen on the paper it chained together to form secure thread strands between the sheets. I found this effect interesting as when flat it was almost like a mini form of bunting, but could easily be folded into a variety of ways to create new shapes.

4/10/16
4/10/16
4/10/17
4/10/17
4/10/18
4/10/18
4/10/19
4/10/19


No comments:

Post a Comment