Friday, 29 May 2015

Module 4, chapter 11: concept 1

From my very initial little experiments I felt that it would make for a more interesting piece if I moved away from a more traditional folder style and perhaps made a more rounded book type structure. Based on my learning from the last chapter on how to attach pages effectively I produced a prototype to test my idea. 

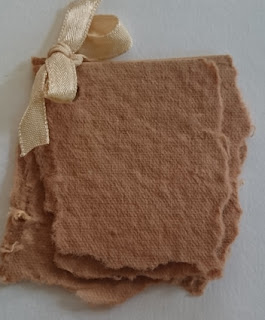
The photos below show this prototype both secured and sealed with a ribbon and how it looks unraveled. I particularly like the 'swirl' effect that the papers give when it is all rolled up as the effect reminds me a lot of the churning water at the back of the cruise boat when sailing. It is also a little reminiscent of some of the 'circular' motifs I came across when photographing text on the boat for example the compass.

I still have another concept to explore further before deciding but I am intrigued to how the idea below could would when combined with the embroidery techniques and my hand crafted papers. I could also bring in elements from previous modules to create a unique ribbon wrap to secure it all together.


4/11/3a
4/11/3a
4/11/3b
4/11/3b
4/11/3c
4/11/3c
4/11/3d
4/11/3d
4/11/3e
4/11/3e

Thursday, 28 May 2015

Module 4, chapter 11: some very initial thoughts

Just progressing along from the previous chapter (creating book-like structures) I started to consider some of the formats a 'backing' structure could have before pages were attached to it. The photos below show my very initial thoughts.


4/11/1a
4/11/1a
4/11/1b
4/11/1b
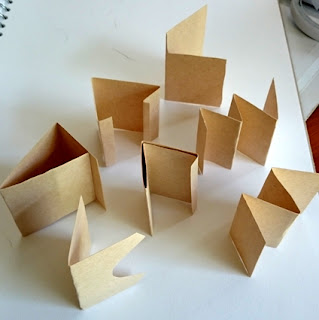
I was not particularly satisfied with these however as they were on the whole dull and predictable. This led me to start considering non-traditional shapes and structures- taking more of a 3D approach. The following images showcase some of my initial thoughts for these. I felt that these were more exciting shapes and had more potential for a more interesting final piece that the first batch I had produced. I particularly liked the concept of having a rounded structure. The other thought not far from my mind at this stage is the possibility of building more on the structure I had created in the previous chapter that can be seen in image 4/10/14.


4/11/2a
4/11/2a
4/11/2b
4/11/2b

Module 4, chapter 10: Book type structures

For this chapter I experimented with a variety of methods to join paper together to create 'book like' structures. I tested both hand stitching and machine stitched techniques. Some samples I used a hole punch so that I could loop ribbon through to connect pieces. Some samples I used a drinking straw to create a 'rod' to connect the pages to. A variety of the initial samples I created can be seen in the following image and this is followed by some close ups and explanations of some of these samples. I then have examples of further developmental samples that I progressed onto. Note that with all my samples I was not focusing on the quality or neatness of what I was doing- if anything I was embracing the unevenness of the paper edges!

4/10/1
4/10/1: A range of initial samples

4/10/2
4/10/2:
Each layer of paper has been individually sewn to a wide piece of ribbon.
This ribbon has then been folded over to the front.
4/10/3
4/10/3:
Hole punched and tied together with ribbon.
A simple but effective method of connecting paper together without the limitations of the number of pages that can be together at one time that the stitching alternatives give.
4/10/4
4/10/4:
Papers stitched down the middle in the machine and then folded in half.
An effective method however limited due to the number of pages that can be stitched together at any one time.
4/10/5
4/10/5:
Hole punched and the wrapped with ribbon over a drinking straw for support.
Must remember for future reference not to punch so close to the edge as the paper is very fragile and tears easily here.
4/10/6
4/10/6:
Paper pages wrapped around a drinking straw and then held in place with hand stitching.
The next stage of experimentation involved me looking into alternative ways of attaching papers together so that I was not feeling limited by the thickness that trying to sew multiple sheets together had been giving me, I had found up until this point that 4 layers was about as thick as I could go with both hand and machine stitching before it became too thick to sew. My first attempts tried a 'staggered' effect- where each sheet was attached only to the one it was next to. The following images show front and back views of how this came out. If I was to go on and use this method I would sew each layer closer together rather than have them as spread out as the photos are showing.

4/10/7
4/10/7
4/10/8
4/10/8
The following images shows an alternative version of these- each layer is sewn to a single background.This gave an interesting 'ruffle' effect.

4/10/9
4/10/9
4/10/10
4/10/10
The next sample created used a 'flouncing' technique that I had previously only used on fabric. This was similar to the 'ruffle' style paper sample but instead of attaching the paper to the backing on the edge, I attached in the center creating a two page effect. Once several pages had been attached in this way I started to see a mini book effect take shape. This would be a particularly good method to use if I wanted to attach a more significant number of pages to my end piece. I have shown this sample from a variety of angles.

4/10/11
4/10/11
4/10/12
4/10/12
4/10/13
4/10/13
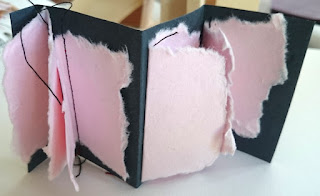
To develop this idea further I created a concertina style backing and attached the pages at different points along the length. The following photos show this open and closed.

4/10/14
4/10/14
4/10/15
4/10/15
The next set of experimental samples I tried were of separate pieces of paper that had been connected through machine stitching. I deliberately kept a wide gap between pages to see what the stitching looked like. Although it did not keep to the same stitch pattern as seen on the paper it chained together to form secure thread strands between the sheets. I found this effect interesting as when flat it was almost like a mini form of bunting, but could easily be folded into a variety of ways to create new shapes.

4/10/16
4/10/16
4/10/17
4/10/17
4/10/18
4/10/18
4/10/19
4/10/19


Sunday, 19 April 2015

Module 4, Chapter 9: Stitched edges

For this chapter I experimented with both machine and hand stitching to edge my papers. There were two reasons for edging these papers: the first was to add decoration and the second was to add some reinforcement as the papers were particularly delicate around these edges. An obvious way to strengthen these would be to cut these flimsy bits off however I wanted to celebrate the beauty these 'natural' edges gave to the paper. I tried a range of stitches from blanket stitch, over stitch, back stitch, running stitch, cross stitch, couching and used a number of pre-programmed stitches on my machine. I also attempted using the lettering on my machine however the raw edges of the paper did not respond particularly well to this leaving the letters distorted and unreadable. See image 4/9/4 for the result of this- and this was the best attempt that I did using this setting!

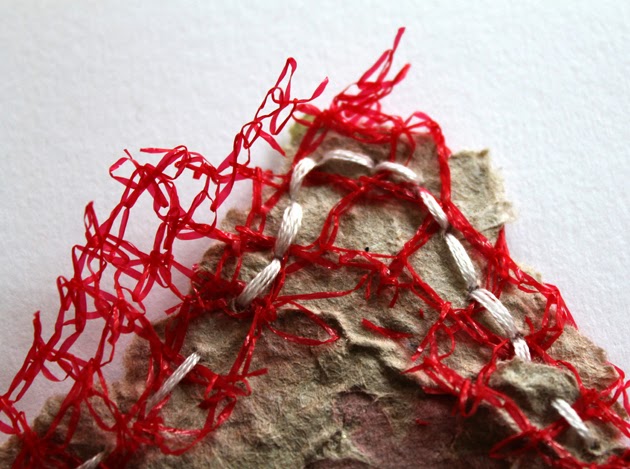
I also tested out adding other components. These ranged from ribbon and shoe laces through to other pieces of paper. These added components not only added decoration but in some cases additionally added support- reinforcing the edges of my papers. On a number of samples I experimented with using red fruit netting wrapped around the paper edge. I really liked the splash of colour this gave and will consider using this on my final embroidered panel.

I came across many challenges with trying out my stitched edges. When machine stitching the stitch patterns did not always come out very clearly. If I got too close to the edge then they could virtually disappear or worse tear the paper. Hand stitching brought issues with needle size. In order to use thick embroidery threads I needed to use larger needles. These could create holes that either rendered the edges too fragile or completely changed the dynamic of the effect I was trying to create. Layering up the machine stitching, especially in rows at the edge of the paper such as in image 4/9/5 I found to add rigidity to the paper. 

To get around the fragility of the paper edges I layered up my papers, using stitching to connect them together. Image 4/9/8 is a good example for this.

In most cases I followed the natural raw edge of my papers. This frequently gave a rather undulating effect. I found this was accentuated the most by edging with machine stitching. This both neatened and strengthened it as well as emphasised the curves within it. I was particularly pleased with the machine version of blanket stitch combined with white satin ribbon- see image 4/9/2. Hand stitching gave a very different effect. If anything it added to the 'roughness' of the paper edge and in some cases made the sample look quite scruffy as in image 4/9/21 although some of this effect could be put down to the netting as well. Hand stitching worked the best when the edge of the paper was particularly uneven- see image 4/9/26.

The following photographs show a range of samples that tested out all the different possibilities I have mentioned. They are not in any particular order. These were the successful ones.... many attempts had to be re-stitched as my learning curve with working with my hand made papers was very steep!


4/9/1
4/9/1

4/9/2
4/9/2

4/9/3
4/9/3

4/9/4
4/9/4

4/9/5
4/9/5

4/9/6
4/9/6

4/9/7
4/9/7

4/9/8
4/9/8

4/9/9
4/9/9

4/9/10
4/9/10

4/9/11
4/9/11

4/9/12
4/9/12

4/9/13
4/9/13

4/9/14
4/9/14

4/9/15
4/9/15
4/9/16
4/9/16

4/9/17
4/9/17

4/9/18
4/9/18

4/9/19
4/9/19

4/9/20
4/9/20

4/9/21
4/9/21

4/9/22
4/9/22

4/9/23
4/9/23

4/9/24
4/9/24

4/9/25
4/9/25

4/9/26
4/9/26