Sunday, 19 April 2015

Module 4, Chapter 9: Stitched edges

For this chapter I experimented with both machine and hand stitching to edge my papers. There were two reasons for edging these papers: the first was to add decoration and the second was to add some reinforcement as the papers were particularly delicate around these edges. An obvious way to strengthen these would be to cut these flimsy bits off however I wanted to celebrate the beauty these 'natural' edges gave to the paper. I tried a range of stitches from blanket stitch, over stitch, back stitch, running stitch, cross stitch, couching and used a number of pre-programmed stitches on my machine. I also attempted using the lettering on my machine however the raw edges of the paper did not respond particularly well to this leaving the letters distorted and unreadable. See image 4/9/4 for the result of this- and this was the best attempt that I did using this setting!

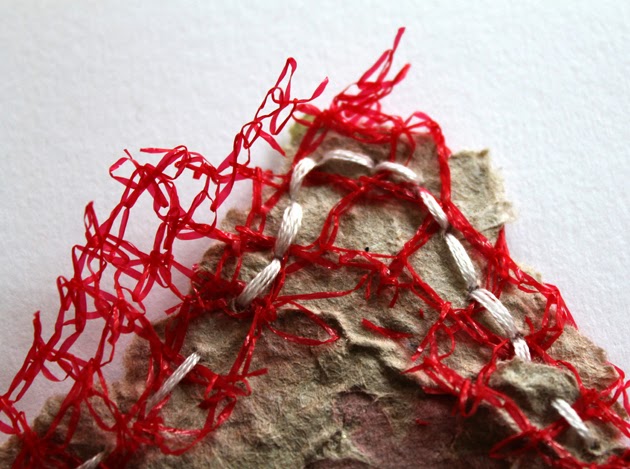
I also tested out adding other components. These ranged from ribbon and shoe laces through to other pieces of paper. These added components not only added decoration but in some cases additionally added support- reinforcing the edges of my papers. On a number of samples I experimented with using red fruit netting wrapped around the paper edge. I really liked the splash of colour this gave and will consider using this on my final embroidered panel.

I came across many challenges with trying out my stitched edges. When machine stitching the stitch patterns did not always come out very clearly. If I got too close to the edge then they could virtually disappear or worse tear the paper. Hand stitching brought issues with needle size. In order to use thick embroidery threads I needed to use larger needles. These could create holes that either rendered the edges too fragile or completely changed the dynamic of the effect I was trying to create. Layering up the machine stitching, especially in rows at the edge of the paper such as in image 4/9/5 I found to add rigidity to the paper. 

To get around the fragility of the paper edges I layered up my papers, using stitching to connect them together. Image 4/9/8 is a good example for this.

In most cases I followed the natural raw edge of my papers. This frequently gave a rather undulating effect. I found this was accentuated the most by edging with machine stitching. This both neatened and strengthened it as well as emphasised the curves within it. I was particularly pleased with the machine version of blanket stitch combined with white satin ribbon- see image 4/9/2. Hand stitching gave a very different effect. If anything it added to the 'roughness' of the paper edge and in some cases made the sample look quite scruffy as in image 4/9/21 although some of this effect could be put down to the netting as well. Hand stitching worked the best when the edge of the paper was particularly uneven- see image 4/9/26.

The following photographs show a range of samples that tested out all the different possibilities I have mentioned. They are not in any particular order. These were the successful ones.... many attempts had to be re-stitched as my learning curve with working with my hand made papers was very steep!


4/9/1
4/9/1

4/9/2
4/9/2

4/9/3
4/9/3

4/9/4
4/9/4

4/9/5
4/9/5

4/9/6
4/9/6

4/9/7
4/9/7

4/9/8
4/9/8

4/9/9
4/9/9

4/9/10
4/9/10

4/9/11
4/9/11

4/9/12
4/9/12

4/9/13
4/9/13

4/9/14
4/9/14

4/9/15
4/9/15
4/9/16
4/9/16

4/9/17
4/9/17

4/9/18
4/9/18

4/9/19
4/9/19

4/9/20
4/9/20

4/9/21
4/9/21

4/9/22
4/9/22

4/9/23
4/9/23

4/9/24
4/9/24

4/9/25
4/9/25

4/9/26
4/9/26

Saturday, 21 February 2015

Module 4, Chapter 8: Stitchery into paper

The main inspiration for these samples came from my CAD experiments. I loved the way that the letters form both structured patterns at one end of the scale and a jumbled 'mess' at the other.

One of my paper samples had a mish-mash of threads embedded into it. This had been the result of attempting to create a random style mesh. Although it hadn't come out as intended I did like the resulting pattern the threads made in the paper and the contrast the threads had against the brown paper pulp. On top of this I used the sewing machine to embroider lines of 'loop' stitches. I started by using red thread but then progressed to using black thread in order to bring another dimension to the sample. The results of this are in the image below.

Module 4, Chapter 8, image 1

Module 4, Chapter 8, image 2


The next sample was a drawn-thread paper sample. Once again I used the machine to embroider loop style patterns onto the surface. Initial I was following the natural lines of the threads within the fabric but deviated a couple of times across in a diagonal (cross grain) direction. I wanted to bring an element of the 'dashed' lettering style from my CAD work so used white and red threads to hand embroider the word 'cruise' on top. This did not quite have the visual strength I hoped it would have (and is not too easy to read!) however it did bring an interesting texture to the sample.

Module 4, Chapter 8, image 3

Module 4, Chapter 8, image 4


I decided to use the machine stitching in various patterns to embroider my red fruit netting paper sample. The more stitchery I added to this sample the more I like it. The stitching brings an intensity and interest to it.

Module 4, Chapter 8, image 5


As I am lucky enough to have a sewing machine with lettering stitches programmed into it I thought I would test out and see how the word 'cruise' would look. After testing on a scrap piece of fabric I produced two samples. On sample simply took each letter separately to stitch rows. The other wrote out the word cruise over and over. I made use of overlapping text on this particular sample. I also chose not to cut off the loose threads on this one as I loved the effect that they gave around the edges. This is something I could consider later on for my final piece? I was initially apprehensive that by using the pre-programmed letters my samples would be kind of 'obvious' however with all the layers I feel that they have worked quite well. It also helped that the lettering was simple in style such as the typography I had researched previously.

Module 4, Chapter 8, image 6

Module 4, Chapter 8, image 7

Module 4, Chapter 8, image 8

Module 4, Chapter 8, image 9

Module 4, Chapter 8, image 10

Friday, 20 February 2015

Module 4, Chapter 7: paper plus grids

In order to create my samples I first needed to create withdrawn thread samples that would later have paper pulp added to them. Below is an image of these samples before the paper process was added. I confess that after the time it had taken to create these to this stage of the process I felt loathed to do anything further to them as I really appreciated how they looked as they were. This is why I made the point of taking this 'before' photo just in case anything went wrong with them.

Module 4, Chapter 7, image 1
Module 4, Chapter 7, image 1: Before paper is added

I found adding paper to my samples was more difficult than I thought it would be. It was a fine line between not adding enough paper pulp and adding too much resulting in not being able to see the drawn thread work detail. The following images show a couple of my samples that I felt just showed the right amount of balance between the two:

Module 4, Chapter 7, image 2

Module 4, Chapter 7, image 3

As well as apply paper pulp to my drawn thread samples I experimented with paper pulp over random threads and over the fruit netting. A 'summary' of my samples is shown in the photograph below:

Module 4, Chapter 7, image 4

Note that other samples I produced for this chapter I reserved for developing further into the next two chapters of this module.

Module 4, Chapter 6: part 3: Experiments with drawn thread work and stitchery

For the final part of this chapter I experimented with both hand and machine stitchery on my drawn thread samples. I quickly discovered that my favourite technique was using the sewing machine. I loved how the machine naturally gathered the threads together to create a more structured effect. I tested out a range of stitch settings ranging from a zigzag to a closer satin stitch. The closer the stitches were the more dramatic the end result. I really appreciated the way in which the satin stitch emphasised the negative space by creating bigger 'gaps' between the threads. My best results were from where I used a gold thread against the black. 

Below displays a 'summary' of the samples I produced followed by close up photos of some of these samples.
Module 4, Chapter 6: part 3: image 1
Module 4, Chapter 6: part 3: image 1: stitchery samples
Module 4, Chapter 6: part 3: image 2
Module 4, Chapter 6: part 3: image 2: close up of sample

Module 4, Chapter 6: part 3: image 3
Module 4, Chapter 6: part 3: image 3: close up of sample

Module 4, Chapter 6: part 3: image 4
Module 4, Chapter 6: part 3: image 4: Close up of sample

Module 4, Chapter 6: part 3: image 5
Module 4, Chapter 6: part 3: image 5: close up of sample

Module 4, Chapter 6: part 3: image 6
Module 4, Chapter 6: part 3: image 6: close up of sample

Module 4, Chapter 6: part 3: image 7
Module 4, Chapter 6: part 3: image 7: close up of sample


Module 4, Chapter 6: part 2: Stitchery to decorate the drawn fabric

Following on my previous sample (where I withdrew threads then wove through these areas with ribbons and other trimmings) I created the same 'base' withdrawn thread sample backing. This time however I used hand stitching to add decoration through:

  • Various embroidery stitches such as chain stitch
  • Weaving the embroidery threads back through to create new patterns.
  • Knotting the embroidery threads around clumps of the black threads in the sample
Additionally on one of the lines I tried threading through a ribbon with knotting it around clumps of threads.

My favourite effect within this sample is where the knotting of the threads around clumps causes 'columns' to form. These create new patterns by emphasising the negative space between them.

On a random note, the pink-black-white line reminds me of licorice allsorts!

Module 4, Chapter 6: part 2: image 1
Module 4, Chapter 6: part 2: Stitchery to decorate the drawn fabric

Module 4, Chapter 6: part 2: image 2
Module 4, Chapter 6: part 2: image 2 Close up of stitchery to decorate the drawn fabric


Module 4, Chapter 6: part 2: image 3
Module 4, Chapter 6: part 2: image 3 Close up of stitchery to decorate the drawn fabric

Module 4, Chapter 6: part 1: Ideas to decorate the drawn fabric

Using the black fabric (with the white warp threads) as a base I first drew out lines of blocks of threads across the width of the sample. Once the threads were withdrawn I had fun trying out a variety of ribbons and trimmings weaving them in and out of the withdrawn threads. As I had withdrawn the white threads the remaining threads were all black. This lead to a stripy effect across the ribbons and trimmings giving in my opinion quite a dramatic effect. On the bottom red ribbon part I used a zigzag stitch to warp the black threads a little. In one area this gives a slight chevron effect. This was however very tricky to keep in place to sew and I soon lost patience with this part of the sample.

Module 4, Chapter 6, part 1
Module 4, Chapter 6, part 1: weaving ribbons and other trimmings through the drawn thread areas